How to Choose the Right Crankshaft Bearing?
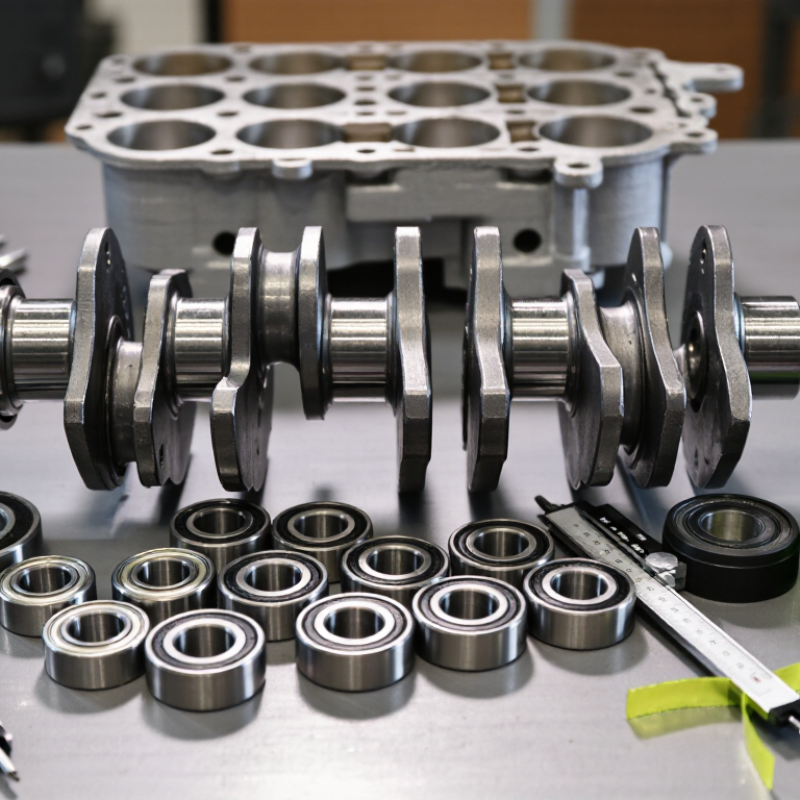
Choosing the right Crankshaft Bearing is not a simple matter of matching a part number. The bearing must suit the crankshaft journal size, engine design, oil viscosity, and expected operating load. A street engine, racing engine, and restored classic engine may require different bearing materials and clearances. Small errors can create serious problems.
Engine builder and technical author Mike Mavrigian has emphasized a practical truth: “Bearing clearance is critical to engine life.” That statement deserves attention during every rebuild. A bearing that feels correct in your hand may still be unsuitable after measurement. The crankshaft journal should be checked with a micrometer. The bearing housing should also be inspected for distortion, wear, and alignment. Plastigage can provide a useful confirmation, but it should not replace accurate measurement.
Material choice matters, too. Tri-metal bearings often provide strong fatigue resistance for demanding engines. Aluminum bearings may suit certain modern applications and can offer good compatibility with specific crankshaft surfaces. Always compare the manufacturer’s specifications. Do not rely only on color, brand reputation, or an old workshop habit.
Look closely at oil holes and grooves. Their position must match the block and crankshaft passages. Check thrust-bearing placement and confirm the correct oversize or undersize option. Even experienced mechanics occasionally overlook a damaged housing or mixed bearing shell. That is the uncomfortable part.
A reliable selection process combines documentation, measurement, clean assembly, and careful judgment. The right Crankshaft Bearing should support stable oil pressure, controlled clearance, and long service life. When uncertain, stop and recheck the evidence. Guesswork is expensive inside an engine.
Identify Crankshaft Journal Size, Taper, and Out-of-Round Within 0.001 in
How to Choose the Right Crankshaft Bearing?
Identify Crankshaft Journal Size, Taper, and Out-of-Round Within 0.001 in
Choosing a crankshaft bearing starts with measurement, not guesswork. Clean each journal carefully, then inspect it under bright light. Dirt can distort readings and hide scoring. Use a calibrated micrometer that reads to 0.0001 inch. Check the micrometer’s zero before measuring. Small errors matter here.
Measure every journal in at least four positions. Take readings near both ends and across two opposing directions. The largest diameter compared with the smallest reveals taper and out-of-round. For example, a 2.0004-inch reading beside a 1.9996-inch reading shows a 0.0008-inch difference. That exceeds a 0.001-inch working limit only when another reading is larger, but it still deserves attention. Do not average the numbers too quickly. The pattern matters.
Keep a written measurement chart. Mark each journal by location, since one crankshaft may contain different conditions. A tapered journal can reduce oil clearance at one edge, while an out-of-round journal can create uneven contact. I have seen clean-looking journals fail this check. That is easy to miss. Measure at room temperature, hold the tool squarely, and repeat doubtful readings. If the results change noticeably, check technique before ordering bearings. Compare the final journal size, taper, and out-of-round against the engine’s service specifications, then select the bearing clearance required for that measured condition.
Set Bearing Oil Clearance at the Manufacturer’s 0.001–0.003 in Target
How to Choose the Right Crankshaft Bearing?
Set Bearing Oil Clearance at the Manufacturer’s 0.001–0.003 in Target
Crankshaft bearing selection begins with measured oil clearance, not appearance. The common manufacturer target of 0.001–0.003 inches equals approximately 25–76 micrometers. That small range controls oil-film strength, heat removal, and crankshaft stability. SAE technical literature on hydrodynamic bearings shows that clearance, viscosity, load, and speed must work together. A bearing that looks perfect may still fail with incorrect clearance.
Measure each journal with a calibrated micrometer and verify the installed clearance with a bore gauge. Do not rely only on bearing markings. Housing distortion, crankshaft grinding, temperature, and cap torque can change the final reading. A 2021 U.S. Department of Energy engine-friction assessment identified friction as a significant share of engine losses, often estimated near 10–20% under operating conditions. Excessive clearance can reduce oil pressure. Tight clearance can wipe the oil film.
Check the oil path.
Use the manufacturer’s specification as the starting point, then confirm real measurements. One imperfect assumption causes trouble: equal bearing shells do not guarantee equal clearance. Record every journal. Recheck any reading that seems unusually clean or unusually high. That extra inspection may feel slow, but it is cheaper than correcting a spun bearing later. References: SAE International technical literature on hydrodynamic journal bearings; U.S. Department of Energy, Vehicle Technologies Office engine-friction assessments.
Match Bearing Material to Load, Speed, and Peak Combustion Pressure
Choosing a crankshaft bearing starts with three realities: load, speed, and peak combustion pressure. SAE engine-development papers commonly report peak cylinder pressures near 80–120 bar in many gasoline engines and 160–220 bar in modern diesel designs. These forces squeeze the oil film and increase fatigue risk. A strong copper-based lining may suit high loads, but a softer aluminum-based material can offer better conformability and embed small debris. The choice is never based on pressure alone.
Speed changes the calculation. At high engine speed, the bearing has less time to build a stable oil film. SAE J300 viscosity data shows why lubricant grade matters, but oil viscosity cannot repair an unsuitable bearing material. Match the lining to journal speed, oil temperature, clearance, and expected load cycles. In field inspections, I look for wiping, cavitation, and localized polishing. These marks often reveal poor oil control, not simple material failure. My first selection is not always the best one.
Tips: Check peak firing pressure, not only rated torque. Confirm bearing clearance after installation. Compare the material’s fatigue strength, seizure resistance, and dirt tolerance. Use test data from SAE technical papers and supplier material reports, then validate the choice on a dynamometer. A small mistake here becomes expensive.
Select Bearing Width, Groove Design, and Wall Thickness for Oil Control
How to Choose the Right Crankshaft Bearing?
Bearing width, groove design, and wall thickness directly influence oil control and crankshaft durability. In my workshop experience, width should match the housing and crankshaft fillet clearance precisely. A bearing that is too wide can restrict crankshaft movement. It may also create unwanted edge loading. Measure the housing bore, journal width, and thrust surfaces before choosing a replacement. Small errors matter.
The groove design controls how oil reaches the journal. A full groove can improve oil distribution, but it may reduce load-bearing surface area. A partial groove preserves more support where combustion loads are highest. Consider the engine’s oil pressure, operating speed, and journal condition. Look for polished bands, scoring, or dark heat marks. These details often reveal poor oil control.
Wall thickness affects clearance, heat transfer, and oil-film stability. Use measured journal dimensions rather than relying only on nominal specifications. Plastigage can provide a quick check, but a micrometer and bore gauge offer better confidence. I have seen installations pass a quick inspection and still show uneven contact later. That is the part worth questioning. Dirt, inaccurate readings, or a distorted housing can mislead even careful technicians. Check alignment, oil passages, and bearing crush before final assembly. Keep the parts clean. Tiny debris can change the result.
How to Choose the Right Crankshaft Bearing?
Select bearing width, groove design, and wall thickness for balanced oil control.
Wider bearings provide greater load-carrying area, while partial grooves preserve more load-bearing surface than full grooves. Wall thickness must match the housing and crankshaft geometry so the bearing maintains stable oil clearance under operating load. The values shown are representative dimensions commonly used for small-to-medium engine bearing shell designs; final selection should follow the engine manufacturer's clearance and load specifications.
Verify Bearing Crush, Back Clearance, and 360° Contact Before Assembly
How to Choose the Right Crankshaft Bearing?
Choosing a crankshaft bearing starts with accurate journal and housing measurements. Do not rely only on catalog dimensions or visual inspection. Measure each journal at several points, checking diameter, taper, and out-of-round conditions. Then compare these readings with the bearing manufacturer’s specifications. A clean, dry trial fit is essential before applying assembly lubricant.
Verify bearing crush after installing the shells in the housing and tightening the fasteners to the specified torque. Crush provides radial tension, helping the bearing stay fixed during operation. Back clearance must also be checked. The bearing back should sit firmly against the housing bore, without dirt, raised edges, or visible gaps. Poor contact can restrict heat transfer and allow shell movement. The fit should feel secure, not forced.
Tips: Use a calibrated micrometer and bore gauge. Check every journal separately. A simple contact pattern can reveal uneven support. Rotate the crankshaft by hand after final assembly; resistance or tight spots deserve investigation. I have seen clean-looking parts fail because one shell was not fully seated. That mistake is easy to make. Check the locating tang, oil holes, and shell edges before tightening. Confirm 360° contact around the bearing back, especially near split lines. The check may seem excessive, but missed contact can create localized loading and rapid wear.
 skip to Main Content
